Instalacion Y Puesta a Punto de un servidor VPS con Debian8 (cambios 2019)
En este articulo voy a resumir. los pasos para instalar:
Servidor LAMP/Cloud: Apache, PHP 7.3, Certificado SSL Validado , Nextcloud16.
Lo que nos va ha permitir usar nuestro servidor vps como una Nube/Cloud propia.
Con la que tener todos nuestros dispositivos sincronizados.
con los siguientes servicios: Archivos , Fotos, Agenda, Contactos , calendario , notas, videollamadas etc…
Se acavo el depender de servicios de terceros.
Indice:
1-actualizo
2-paro-desabilito-servicios-innecesarios
3-compruebo que el sistema esta al minimo
4-utilidades-sistema
5-instalar-apache
6-instalar-php7-3 en debian8 (necesario-nextcloud)
7.Certbot (certificados ssl firmados para https)
- 7.1. Instalar certbot
- 7.2. Habilitar ssl en apache
- 7.3. Ejecutar cerbot
- 7.4. workarround2 (renovar el certificado a mano)
- 7.5. Comprobar certificado ssl
- 7.6. Analizar certificado
8-instalar nextcloud16 en debian8
9-algunos-modulos-nextcloud-a-instalar
10- Asegurarlo todo un poco.(un poco de Hardening)
11-notas
referencias
1. Actualizo
apt-get update -y
apt-get upgrade -y

apt-get update -y
apt-get dist-upgrade -y
Esto puede tardar.
Nota: (desde 2019 lo backports han pasado a archive) echo "deb http://archive.debian.org/debian jessie-backports main" > /etc/apt/sources.list.d/backports.list
Nota: (desde el 2019 a veces hay que añadir -o Acquire::Check-Valid-Until=false )
echo "deb http://archive.debian.org/debian jessie-backports main" > /etc/apt/sources.list.d/backports.list
apt-get -o Acquire::Check-Valid-Until=false update -y
apt-get -o Acquire::Check-Valid-Until=false upgrade -y
Nota: si la conexion ipv6 da problemas puedes desactivarla temporalmente:
sysctl -w net.ipv6.conf.default.disable_ipv6=1
sysctl -w net.ipv6.conf.all.disable_ipv6=1
En mi caso antes de actualizar he tenido que bloquear unos paquetes.
Un posible problema con el nucleo de la maquina anfitrion.
apt-mark hold procps udev systemd systemd-sysv
Para Comprobar version: lsb_release -a
2. Paro/Desabilito servicios innecesarios
Miro Procesos.
root@jejo.es:~# pstree -lc
systemd-+-kthreadd/580649---khelper/580649
        |-rpcbind
        |-sshd---sshd---bash---pstree
        |-postfix
        |-saslauthd
        |-systemd-journal
        |-systemd-network
        |-systemd-resolve
        `-systemd-udevd
Paro y desabilito todo lo que no necesito.
systemctl stop postfix
systemctl disable postfix

systemctl stop saslauthd
systemctl disable saslauthd

systemctl stop rpcbind
systemctl disable rpcbind
3. Compruebo que el sistema esta al “minimo”.
pstree -lc && ss -ltn
root@45:~# pstree -lc && ss -ltn
systemd-+-kthreadd/580649---khelper/580649
        |-sshd---bash---pstree
        |-sshd
        |-systemd-journal
        |-systemd-network
        |-systemd-resolve
        `-systemd-udevd

State       Recv-Q Send-Q                              Local Address:Port                                Peer Address:Port
LISTEN      0      0                                               *:22                                          *:*
No deberia haber ningun proceso que no conozca, ni ningun servicio a la escucha.
En este caso solo el sshd. (aunque si no lo paro deberia asegurarlo y cambiarlo de puerto)
4. utilidades sistema
#http://www.tutorialspoint.com/articles/top-tools-to-monitor-linux-performance
apt install -y wget curl  mc htop iftop iotop
5. Instalar Apache
apt-get install apache2 -y # No tenia el apache instalado ;)
Comprobacion:
root@jejo.es:~# curl -qs localhost | grep title
    <title>Apache2 Debian Default Page: It works</title>
6. Instalar php7.3 en debian8 (necesario nextcloud)
Mas info en este tutorial.
https://blog.programster.org/debian-8-install-php-7-1
Aunque algunas partes han cambiado. (modificar algunos comandos desde los ultimos cambios en los repositorios de debian8)
apt-get install apt-transport-https lsb-release ca-certificates -y

wget -O /etc/apt/trusted.gpg.d/php.gpg https://packages.sury.org/php/apt.gpg
echo "deb https://packages.sury.org/php/ $(lsb_release -sc) main" >> /etc/apt/sources.list.d/php.list

apt-get update
apt-get install dialog
apt-get install php7.3 php7.3-zip  php7.3-xml  php7.3-curl  php7.3-gd  php7.3-sqlite php7.3-mbstring -y
apt-get install php7.3-imagick #opcional
apt-get install php7.3-intl && phpenmod intl #opcional

/etc/init.d/apache2 restart
Cambio aPHP 7.2 (parece que con php7.3 no funciona el correo.
x="$(dpkg --list | grep php | awk '/^ii/{ print $2}')"
apt-get --purge remove $x

apt-get update
apt-get install dialog
apt-get install php7.2 php7.2-zip  php7.2-xml  php7.2-curl  php7.2-gd  php7.2-sqlite php7.2-mbstring -y
apt-get install php7.2-imagick #opcional
apt-get install php7.2-intl && phpenmod intl #opcional
/etc/init.d/apache2 restart
Comprobacion:
echo "<?php phpinfo(); ?>" > /var/www/html/test.php
chown www-data:www-data /var/www/html/test.php
chmod 750 /var/www/html/test.php
curl -qs localhost/test.php | grep title
root@jejo.es:~# curl -qs localhost/test.php | grep title
<title>PHP 7.3.7-2+0~20190725.42+debian8~1.gbp848ca5 - phpinfo()</title>
7.Certbot (certificados ssl firmados para https)
Mas info en este tutorial.
https://www.digitalocean.com/community/tutorials/how-to-secure-apache-with-let-s-encrypt-on-debian-8
Aunque algunas partes fallan. (hay que modificar algunos comandos desde los ultimos cambios en los repositorios de debian8)
7.1. Instalar certbot:
echo 'deb http://archive.debian.org/debian jessie-backports main' > /etc/apt/sources.list.d/backports.list

apt-get -o Acquire::Check-Valid-Until=false update
apt-get install python-certbot-apache -t jessie-backports -y
7.2. Habilitar ssl en apache:
a2enmod ssl
service apache2 restart
Nota: No solo basta con habilitar ssl para que funcionen las paginas https necesitas un certificado firmado.
root@jejo.es:~# curl https://localhost
curl: (35) error:140770FC:SSL routines:SSL23_GET_SERVER_HELLO:unknown protocol
7.3. Ejecutar cerbot
Nota: (funciona parcialmente ver workarround)(en rojo lo rellenado)
root@45:~# certbot --apache
Saving debug log to /var/log/letsencrypt/letsencrypt.log
No names were found in your configuration files. Please enter in your domain
name(s) (comma and/or space separated)  (Enter 'c' to cancel):tudominio.es
Enter email address (used for urgent renewal and security notices) (Enter 'c' to
cancel):TuEmail@tudominio
Starting new HTTPS connection (1): acme-v01.api.letsencrypt.org

-------------------------------------------------------------------------------
Please read the Terms of Service at
https://letsencrypt.org/documents/LE-SA-v1.2-November-15-2017.pdf. You must
agree in order to register with the ACME server at
https://acme-v01.api.letsencrypt.org/directory
-------------------------------------------------------------------------------
(A)gree/(C)ancel: A
Obtaining a new certificate
Performing the following challenges:
Client with the currently selected authenticator does not support any combination of challenges that will satisfy the CA.
Client with the currently selected authenticator does not support any combination of challenges that will satisfy the CA.

IMPORTANT NOTES:
 - If you lose your account credentials, you can recover through
   e-mails sent to TuEmail@tudominio.
 - Your account credentials have been saved in your Certbot
   configuration directory at /etc/letsencrypt. You should make a
   secure backup of this folder now. This configuration directory will
   also contain certificates and private keys obtained by Certbot so
   making regular backups of this folder is ideal.
root@45:~#
7.4. workarround2 renuevo el certificado a mano
Nota: (en rojo lo rellenado)
certbot --authenticator webroot --installer apache
root@jejo.es:~# certbot --authenticator webroot --installer apache
Saving debug log to /var/log/letsencrypt/letsencrypt.log
No names were found in your configuration files. Please enter in your domain
name(s) (comma and/or space separated)  (Enter 'c' to cancel):tudominio.es
Starting new HTTPS connection (1): acme-v01.api.letsencrypt.org
Obtaining a new certificate
Performing the following challenges:
http-01 challenge for tudominio.es

Select the webroot for tudominio.es:
-------------------------------------------------------------------------------
1: Enter a new webroot
-------------------------------------------------------------------------------
Press 1 [enter] to confirm the selection (press 'c' to cancel): 1
Input the webroot for tudominio.es: (Enter 'c' to cancel): /var/www/html/
Waiting for verification...
Cleaning up challenges
Generating key (2048 bits): /etc/letsencrypt/keys/0000_key-certbot.pem
Creating CSR: /etc/letsencrypt/csr/0000_csr-certbot.pem
Created an SSL vhost at /etc/apache2/sites-available/000-default-le-ssl.conf
Deploying Certificate to VirtualHost /etc/apache2/sites-available/000-default-le-ssl.conf
Enabling available site: /etc/apache2/sites-available/000-default-le-ssl.conf

Please choose whether HTTPS access is required or optional.
-------------------------------------------------------------------------------
1: Easy - Allow both HTTP and HTTPS access to these sites
2: Secure - Make all requests redirect to secure HTTPS access
-------------------------------------------------------------------------------
Select the appropriate number [1-2] then [enter] (press 'c' to cancel): 2
Enabled Apache rewrite module
Redirecting vhost in /etc/apache2/sites-available/000-default.conf to ssl vhost in /etc/apache2/sites-available/000-default-le-ssl.conf

-------------------------------------------------------------------------------
Congratulations! You have successfully enabled https://tudominio.es

You should test your configuration at:
https://www.ssllabs.com/ssltest/analyze.html?d=tudominio.es
-------------------------------------------------------------------------------

IMPORTANT NOTES:
 - Congratulations! Your certificate and chain have been saved at
   /etc/letsencrypt/live/tudominio.es/fullchain.pem. Your cert will
   expire on 2019-10-31. To obtain a new or tweaked version of this
   certificate in the future, simply run certbot again with the
   "certonly" option. To non-interactively renew *all* of your
   certificates, run "certbot renew"
 - If you like Certbot, please consider supporting our work by:

   Donating to ISRG / Let's Encrypt:   https://letsencrypt.org/donate
   Donating to EFF:                    https://eff.org/donate-le
7.5. Comprobar certificado
curl -vs https://localhost | head
7.6. Analizar certificado
https://www.ssllabs.com/ssltest/analyze.html
Nota: Para renovar el certificado manualmente
/etc/init.d/apache2 stop
certbot renew --dry-run -v --standalone --force-renewal
#si todo bien
certbot renew -v --standalone
/etc/init.d/apache2 start
8. Instalar Nextcloud16 en debian8
Mas info en este tutorial.
https://www.howtoforge.com/tutorial/how-to-install-nextcloud-15-on-debian-9/
Aunque algunas partes hay que cambiarlas. (modificar algunos comandos para adaptarlo a debian8)
mkdir /var/www/html/micloud
chown www-data:www-data /var/www/html/micloud
chmod 750 /var/www/html/micloud

mkdir -p /var/www/micloud/data
chown www-data:www-data /var/www/micloud/
chmod 750 /var/www/micloud/
chown www-data:www-data /var/www/micloud/data
chmod 750 /var/www/micloud/data

cd /var/www/html/micloud/
wget https://download.nextcloud.com/server/installer/setup-nextcloud.php
chown www-data:www-data setup-nextcloud.php
chmod 750 setup-nextcloud.php
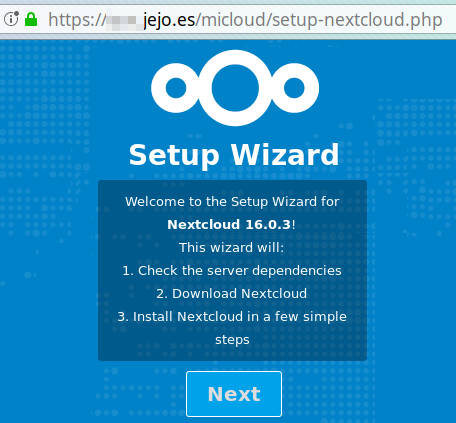
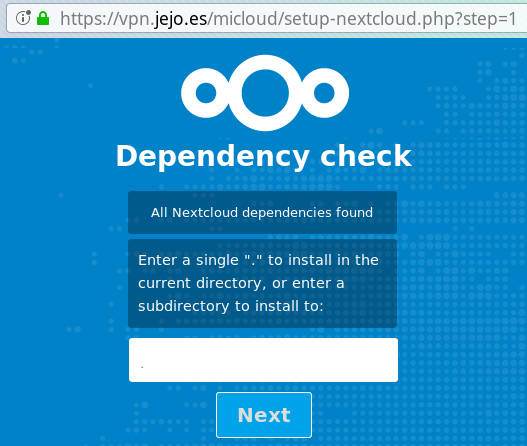
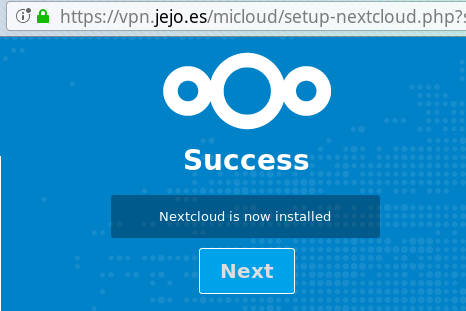
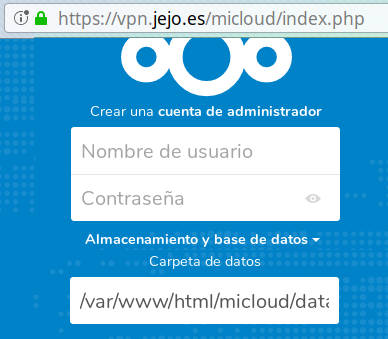
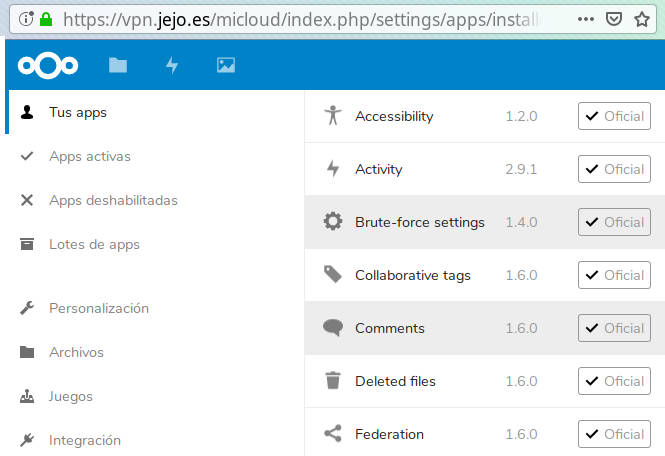
Visitar la url: https://tudominio.es/micloud/setup-nextcloud.php
Y seguir las instrucciones. (ver imagenes)
9. Algunos Modulos Nextcloud a instalar.
- Ransomware recovery
- Keeweb
- Talk Chat, video & audio-conferencing using WebRTC
- Notes
- Contacts
- Task
- Calendar
- Markdown Editor
- README.md
- Restrict login to IP addresses
- Two-Factor Gateway
10. Asegurarlo un poco. (un poco de Hardening)
10A Hardening apache
Para empezar vamos a dejar en blanco la portada.
Asi el nextcloud quedaria oculto. (solo se puede acceder si conoces la url)
cp /var/www/html/index.html{,$(date -I)}
echo > /var/www/html/index.html
rm /var/www/html/test.php
De momento tambien paramos ssh hasta asegurarlo.
/etc/init.d/ssh stop
Notas:
- Si me salgo del ssh ya no podre volver a entrar. (lo acabo de parar)
- Para volver a entrar en la maquina por ssh (si no tienes consola) tendras que reiniciarla. Asi arrancara el sshd. (solo lo he parado no lo he desabilitado)
- Recuerda dejar ssh parado si no lo vas ha utilizar.
10B Compruebo que el sistema esta al “minimo”.
pstree -lc && ss -ltn
root@jejo.es:~# pstree -lc && ss -ltn
systemd-+-apache2-+-apache2
        |         |-apache2
        |         |-apache2
        |         |-apache2
        |         `-apache2
        |-kthreadd/580649---khelper/580649
        |-sshd---bash---pstree
        |-systemd-journal
        |-systemd-network
        |-systemd-resolve
        `-systemd-udevd

State       Recv-Q Send-Q          Local Address:Port       Peer Address:Port
LISTEN      0      0                           *:443                   *:*
LISTEN      0      0                           *:80                    *:*
Como se ve solo esta el apache a la escucha de los puertos 80 y 443.
11. Notas:
Opcional Nextcloud15 en debian8
Mas info en este tutorial.
https://www.howtoforge.com/tutorial/how-to-install-nextcloud-15-on-debian-9/
Aunque algunas partes hay que cambiarlas. (modificar algunos comandos para adaptarlo a debian8)
cd /var/www/html/
wget https://download.nextcloud.com/server/releases/latest-15.tar.bz2
tar -xvjf latest-15.tar.bz2
rm latest-15.tar.bz2

chown -R www-data:www-data /var/www/html/nextcloud
chmod -R 750 /var/www/html/nextcloud
find nextcloud/ -type d -exec chmod 750 {} \;
find nextcloud/ -type f -exec chmod 640 {} \;
mv nextcloud micloud15
Nota: posibles problemas con ipv6 (Depende del anfitrion)
Desabilitar IPv6 debian 8
He notado que fallan las conexiones ipv6.
Ej al hacer wget https://download.nextcloud.com/server/releases/latest-15.tar.bz2 tarda muchisimo.
Esto posiblemente dependa del anfitrion que tengas.
Luego no es aplicable en todas las vps.
#Comprobar ipv6
netstat -tunlp |grep p6
ip a | grep inet6
sysctl net.ipv6.conf.all.disable_ipv6
sysctl net.ipv6.conf.default.disable_ipv6
sysctl net.ipv6.conf.lo.disable_ipv6

#Permanentemente
nano /etc/sysctl.conf
#añadir
net.ipv6.conf.all.disable_ipv6 = 1
net.ipv6.conf.default.disable_ipv6 = 1
net.ipv6.conf.lo.disable_ipv6 = 1
Para Revertir quitar las lineas y reiniciar.
Nota: En mi caso este problema solo me afectaba al rendimiento con php7.3 no con php7.2 (casi inapreciable).
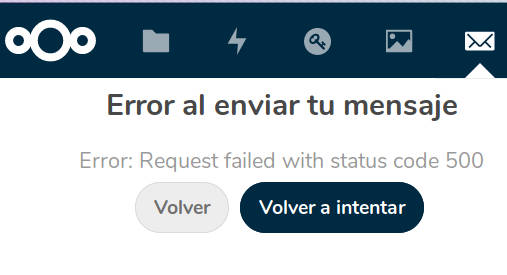
Tambien fallaba al enviar correo desde el plugin mail solo con nextcloud16 y direcciones ip6.
Pero no me falla con nextcloud15. (perro verde) (lo de perro verde es porque es un problema dificil de detectar.)
Referencias:
https://blog.programster.org/debian-8-install-php-7-1
https://www.cyberciti.biz/faq/installing-php-7-on-debian-linux-8-jessie-wheezy-using-apt-get/
https://geekflare.com/10-best-practices-to-secure-and-harden-your-apache-web-server/
https://www.ssllabs.com/ssltest/analyze.html
https://www.digitalocean.com/community/tutorials/how-to-secure-apache-with-let-s-encrypt-on-debian-8
https://nextcloud.com/install/#instructions-server
https://download.nextcloud.com/server/releases/
https://docs.nextcloud.com/server/16/developer_manual/
https://docs.nextcloud.com/server/15/admin_manual/maintenance/manual_upgrade.html
https://linux-audit.com/configure-hsts-http-strict-transport-security-apache-nginx/
https://www.howtoforge.com/tutorial/how-to-install-nextcloud-15-on-debian-9/
https://geekflare.com/10-best-practices-to-secure-and-harden-your-apache-web-server/